Wednesday, July 6, 2011

Recipes

So, here are a few quickies!

Strawberry Balsamic Jam - the procedure here is to cook the strawberries on low heat until they've given up a good bit of their liquid, then add 2 tablespoons of balsamic vinegar for every cup of strawberries, and simmer it slowly for a few more minutes. *OPTIONAL* Strain the berries before adding the balsamic, the juice they give up is amazing.

Strawberry Lemon Mint vinaigrette - whisk together strawberry juice and white wine vinegar, then add in some chiffonade mint (very thin strips, minced works as well), and whisk into a vinaigrette using lemon oil. If lemon oil is unavailable, use regular olive oil and a small squeeze of lemon juice.

Salad - using our vinaigrette, we can do a mixed green salad with toasted coconut, macademia sesame brittle, and an assortment of leafy greens. Preferably no radicchio.
Published with Blogger-droid v1.7.2

Tuesday, July 5, 2011

Testing

So, due to an all time low in computer availability, I'm testing out an app for posting by phone. Cross your fingers and hope for posts!
Published with Blogger-droid v1.7.2

Saturday, June 18, 2011

Equipment

So this post is a tad inspired. By shiny stuff. I recently received a birthday gift, and being a cook, most of the gifts I receive are kitchen related. Well, this gift wasn't just kitchen related. This gift was a chef's knife. A knife is to a chef what a gun is to a soldier (or at least that's what the movies tell me). Some chefs are more than happy to inflict bodily harm on anyone who touches their knife.

Well, the knife I received is a Shun Bob Kramer Meiji Chef's Knife (http://www.williams-sonoma.com/products/shun-bob-kramer-meiji-chefs-knife/) and it is the greatest knife I have ever held. It is also the sharpest. I have cut myself without noticing several times already, and I've only had it for a week. That's how sharp it is. And that's what inspired the post today!

TAKE GOOD CARE OF YOUR TOOLS

I could probably walk into every home in the USA and find dull knives in 90% of them. Most of the time, this is because the knife has never been honed. Everybody knows about sharpening knives, but how many people know about honing them? You know that metal rod you always see chefs running their knife on real fast? That's a steel. They're honing their knife. Your knife's edge doesn't degrade rapidly enough to require sharpening on a regular basis - the most minor of imperfections on the blade can all be straightened by honing your knife. Almost everyone owns a steel. Just run your knife along the steel towards  the handle at your preferred angle. The Japanese prefer a very sharp edge at around 10-11 degrees, whereas the French and Germans prefer 18-20 degrees. Do both sides, and don't try to imitate the chefs on TV. We all laugh because they're ruining the edge doing it that fast.

That's all!

Tuesday, June 14, 2011

Back In The Blog!

So, over the past few weeks my hardware has been giving me some issues. This is officially no longer a problem! Unfortunately, I have to post this about 8 minutes before I leave for work so the next full post won't be up until later tonight. So in the mean time, here is a little bit of advice for creative cookers.

Always experiment with your recipes. Just because chefs do this all the time, that doesn't mean we get things perfect the first time around. A lot of recipes go through a dozen or more adjustments before we are satisfied with the final product. For example, I took it upon myself one day to make a recipe for Maple Bacon Cinnamon Rolls. It took me 7 batches before I was satisfied with the cinnamon/maple/bacon flavor balance, and that involved a lot of different methods of conveying flavor, from maple syrup in the dough to bacon fat slathered on the dough just before rolling and cutting.

Be patient - test recipes 50 times if you have to, if you aren't entirely satisfied with your end product. Now get out there and cook damnit!

Tuesday, June 7, 2011

Shenaningans

Unfortunately, my computer recently decided to do some undeclared shenanigans and the blog had to be put on hold for a few days. My main computer for the blog should be back working by tomorrow, when the recipes will start flowing like water (or if you're from here, beer) again.

Sorry for the hold up, these things happen :(

In the mean time, bacon shenanigans! Simple stuff today - Laquered Bacon. Set your oven to around 300 degrees, get a sheetpan, a wire rack, bacon, and sweet soy sauce ready. put the wire rack on the sheet pan, but the bacon on the rack, and put it in your oven. Every 10 minutes, pull the bacon from the oven, brush it with sweet soy, and put it back in the oven. after 40 minutes, flip the bacon over and start brushing the other side.

After about 80-90 minutes, voila! Laquered Bacon. It's pretty awesome.

Thursday, June 2, 2011

KISS

KISS is one of our favorite acronyms in the kitchen. It answers pretty much everything, and solves most problems. Keep It Simple Stupid. Somehow, it is also one of the hardest things to do. This is how a lot of dishes can become unbearable to make, or even just to think about making.

Good food can be simple food. Simple food can be good food. We have a dessert on our menu that has a grand total of 7 ingredients. Dark chocolate, eggs, black cap raspberries, white chocolate, cream, sugar, pinot noir. There are 4 different components to this dessert too.

Keep it simple, stupid.

Saturday, May 28, 2011

Diet

Another break from the kitchen today. This time, it's to talk about diet, nutrition, and my personal opinions on a few parts of the health culture. Personally, I think almost everything we know about "proper nutrition" is wrong, for the sole reason that there is too much contradicting evidence.

Look at the movie Super Size Me - Morgan Spurlock ate nothing but McD's for 30 days and gained a ton of weight, and became quite unhealthy by the end of it. Now look at a similar movie, Fat Head. In Fat Head, Tom Naughton eats nothing but McDonalds for 30 days and he loses weight, lowers his bad cholesterol, and raises his good cholesterol. That's right, he gets healthier. How? He doesn't overeat. Simple as that.

A lot of people think that eating meat is what makes you fat and unhealthy, because of the lipid hypothesis. The lipid hypothesis states that Saturated Fat raises your Cholesterol, and high Cholesterol causes Heart Disease, therefore Saturated Fat causes Heart Disease. The study that supports this theory compared the saturated fat intake of 6 countries with their rate of heart disease, and sure enough the data supports the theory. Japan had a very low saturated fat intake and a low rate of heart disease, while the UK and the USA had high amounts of both. However, there were 16 other countries in that study that did not support the theory, such as Norway and Denmark, where the saturated fat intake was higher than that of the US and UK, but heart disease rates that were similar to that of Japan. Study doesn't look so good when you include those data points.

Here's a fun quote for you. It's paraphrased, but it says the same thing - You have a little over a teaspoon of sugar in your blood, when you have normal blood sugar levels. The FDA recommends eating 300 grams of carbs each day - that converts to a cup and a half of sugar in your blood

Personally, I don't think it matters what your diet is, provided you eat everything in moderation. When it comes right down to it, no matter what you're eating, we're all consuming the same important things - minerals, vitamins, carbs, protein, fat, and water. So eat whatever you want - just not too much of it.

Cheers!

Friday, May 27, 2011

The Do's and Don'ts of Being a Customer

I'm taking a small break from the kitchen talk today, so I can instead write about restaurants from the customer side of the equation. There are a lot of things that are ok to do in restaurants, there are some things that are acceptable, and then other things that are not so acceptable. So, in the interest of everyone enjoying your next night out (waiters included), here are a few things to keep in mind when eating out. This may not apply to chain restaurants, and some less formal places, but when it comes to nice restaurants keep em in mind.

Don't Be A Dick - It's great that you like things a particular way. You shouldn't eat things you don't like. This gives you the right to ask your waiter for your steak rare or well done, dressing on the side for your salad, and the occasional ingredient omitted from a particular dish. What it doesn't do though, is give you the right to treat your waiter like shit. Most restaurants will cook a steak to medium rare if the customer doesn't specify a doneness. If you didn't tell your waiter how you wanted it cooked, you can't complain about a medium rare steak when secretly, you wanted it well done. Also, shame on you for wanting a well done steak. Personally, anything past rare is a waste of meat, time, and energy (that's just me though).

Ask Questions - A lot of servers who work in fine dining restaurants either care about what the restaurant is doing, or enjoy being a server. They don't enjoy a barrage of inane questions like "How much ice comes with a soda", but if you ask about the food, they will take note of a few things. The first one is how you ask the question. Ask it nicely, in a manner that conveys your interest. The second thing is how technical the question is. If you ask about where the fish you're eating came from, then you sound like someone who only cares about the latest food news (currently that news is local/organic/sustainable, and around the Portland area in Oregon, gluten free). If you ask what region of the world a particular dish is from or inspired by, then you sound interested in the cuisine as a whole, and it gives the impression that you want to expand your horizons, food wise.

Make Reservations - If you're planning on going to a nice restaurant that is fairly popular, make reservations. Try to make them a day in advance, and 2-3 days if you're going out on the weekend. Obviously this only applies to places that take reservations, but it is the easiest thing you can do to make your night smooth. When the restaurant is expecting you, they will seat you time and time again, without fail. When you show up at 8:00 on a Friday night with 3 friends and ask about getting a table and are turned away, you shouldn't be surprised. As a side note to this one, call the restaurant if you cannot make your reservation, or if you are running late. Made a reservation for 7:30pm for 4 but can't make it? The staff might be a bit unhappy when they have to turn away 4 regulars at 7:35 because they're expecting you, instead of seating them because you called at 7:25 to apologize and say you won't be able to be there.

Finally, there is one last thing I'd like to remind you all of before you go out to eat again. It's the Golden Rule for eating out.

Don't fuck with the people who cook your food.

We won't do anything to your entree, or your appetizer or your salad. In this kitchen, we don't have problems with customers. They might start out problematic, but the food fixes that all on it's own. At restaurants that aren't aspiring to 3 Michelin stars though? It might not be the same.

That's all for today! Be nice to your servers, the happier you are the happier they are.

Wednesday, May 25, 2011

Sugar

So, we back here in the kitchen got a little distracted today during lunch service, and thanks to that, I have fun stuff to blog about! Sugar. Here in the restaurant we use a lot of sugar garnishes for desserts. One of them is a sugar spiral, which is nothing but caramelized sugar. They're a lot of fun to make, and really easy when done right, and they make everyone go "Oooohh, ahhhhh, you're so talented!" So, here we go into the wonderful world of sugar.

So, here's what you'll need
1 very very very very very clean, small pot
1 cup Sugar
1/4 cup Water
1 Spoon
Silpats if you have them. Otherwise, wax/parchment paper.

Put your sugar and water into your pot, and let it sit on medium heat until all the water has boiled out and the sugar begins to caramelize. While this is happening, fill your sink with about 2 inches of cold water, and lay out your silpats/parchment/wax paper.

Once the sugar has reached a good caramel color (looking for a fairly dark amber, almost red), dip the bottom of the pot into the water for a few seconds while stirring the sugar with your spoon. Pick up a spoonful and drizzle it back into the pot. You're going to want to do this over and over as the sugar cools, so you can get a good visual on the proper consistency. You want thin thin ribbons that fall from the spoon fairly quickly, but not so quickly that the ribbon would break if you were to start wiggling the spoon vigorously. Cause that's the next step.

Once your sugar makes nice ribbons, pick up quarter to half full spoonfuls and drizzle in patterns onto your chosen surface. After a few seconds (10-20), they'll be set up so you can pick them up and put them on desserts to impress your guests! With practice, you can start blowing sugar bubbles (quite difficult), and then move on to sugar sculpting, which can be even more difficult.

Good Luck!

Tuesday, May 24, 2011

Mike, C'mon. Seriously.

So, we're waiting for Mike Symon to man up and get on the scheduling train so we can fly to New York for Iron Chef America. Still. It's been 3 months now. I mean c'mon Mike, seriously? It won't be that bad. Maybe we can ask the network to edit out the parts where Patrick makes you cry, that'll speed things up. Right? We've been waiting to fly out there to film for 6 months now, and the last 3 were because of you!


C'mon Mike. Seriously.

Saturday, May 21, 2011

Happy Rapture!

Supposedly the rapture happens today. So, here's a celebratory drink or two for those among us who are overly confident that we'll still be fine tomorrow morning (save the hangover). We might as well enjoy ourselves, right?

The End of The World
.5 oz Bacardi 151
.5 oz Vodka
.5 oz Wild Turkey

Straight into a shot glass!

The Antichrist
.5 oz Everclear
.5 oz Bacardi 151
.5 oz Absolut Peppar
Dash of Tabasco

Straight into a shot glass, Tabasco on top

The Elvis
1 shot Banana Liqueur
1 shot Hazelnut Liqueur
2 shots Bakon Vodka
Splash of cream

Shake with ice and serve over ice in a rocks glass

On an unrelated note (I hope), I am walking in my culinary school graduation ceremony today. I'm quite excited, even though I finished classes 6 months ago, and got my diploma in the mail 2 months ago. Mostly because I can go back and be a jackass to all my classmates because I'm doing better than they are. And they all disliked me during classes. Because I was usually a jackass to them.

Good Times.

Thursday, May 19, 2011

BBQ Time

Today's post will be all bbq. Nothing says summer like firing up the barbeque and spending a day drinking, cooking, and eating. Preferably with the addition of colorful explosives (I'm a fan of the 4th of July, could you tell?). So, to kick off summer, here are a few things to remember when you break out the ribs, chickens, and steaks.

Make Your Own BBQ Sauce - Everyone has their favorite brand of barbeque sauce, whether it's A1, Jack Daniels, or Sweet Baby Rays. My personal favorite barebeque sauce is my father's, and I would love to share it with you all, but he won't tell anyone the recipe. So here's a few ingredients for you, but no measurements. Everyone likes their sauce differently, and these items together make the perfect launching pad for your perfect sauce.

Carrot (Remember to saute vegetable matter before adding other ingredients)
Onion
Celery
Ketchup
Cola (I prefer Coke)
Brown Sugar
Cayenne Pepper
Black Pepper
Chili Powder
Paprika
Oregano

And, if you're feeling adventurous, maple syrup can make some amazing sauces. It should be noted that you can use tomato products like crushed tomatoes, tomato puree or paste, or whole tomatoes, instead of ketchup. I just prefer it because of the salt content and the consistency.

Make Your Own BBQ Rubs - We've all seen the jars of assorted spices sitting on the shelves, or the shaker bottles that make you wonder if they intend for you to shake it on top just before eating, or put it on the meat before cooking, or the 2 pounds bottles that last 7 years. Here's a thought - make your own rub! It's very simple, all it takes is ground spices, salt, and sugar. Here's my boss's rub recipe. He said the quantity of spices and herbs can be adjusted so the rub can go on anything.

Raw Sugar
Kosher Salt
Sel Gris (fancy salt)
Thyme
Oregano
Red Chili Flake
Paprika
Dried Ground California Chiles

The important thing here is to have exactly equal portions of salt and sugar. 1/2 cup sugar, 1/4 cup kosher, 1/4 cup sel. Or whatever your batch size might be.

Take Your Time - Don't rush it. Don't rush it at all. If you're doing 2 chickens, don't rush em. If you're doing 1 steak, don't rush it. If you're doing 1400 burgers, don't rush em. But you should probably get a bigger barbeque.

Thats it for now! More of cooking in the great outdoors tomorrow! (Backyards count, right?)

Wednesday, May 18, 2011

The Cure

It's getting to be summer time here, and it's about now when everyone starts to break out their bbq's, grills, and smokers. So, over the next few days, we'll get down on some bbq rubs, some cures, and some smoked foods. 

First things first, smoking, and we're starting from square one. Don't let anybody tell you that your kitchen keeps you from doing smoked foods. You can build a stove top smoker for hot smoking, and with some crafty maneuvers, you can do cold smoking as well.

To build a stove top smoker, you can go cheap or expensive. The cheap way consists of aluminum foil covering the bottom of your biggest pot, with a wire rack over the top of the pot, sealed by more aluminum foil. Put your wood chips in the bottom (apple is a great smoking wood), crank the heat, build some smoke, and hang anything you want from the rack. The "expensive" way is going to a local restaurant supply store and spending roughly $20 on 2 hotel pans, a grate insert for said pans. Put one on the stove top, put down your wood chips, put the grate over the top and the 2nd hotel pan on top upside down as a lid. Build up smoke and place your food items on the grate. For those interested in cold smoking, you will need to purchase some ductwork from Home Depot, Lowes, or any store of that nature. To cold smoke, you simply need the smoke to travel far enough so it cools down by the time it reaches your food. These setups can be difficult to jury rig in a home environment.

Now that you've got your smoker ready, let's chat for a minute about all the things the can be smoked. Just about anything. From cheeses to meats to fish to fruit, almost anything can be smoked. Today, I'm just going to give you one recipe (dinner service is starting and I'm supposed to be at my station in like 4 minutes).

Smoked Salmon!

1 Salmon Filet
1/4 cup Salt
1/4 cup Brown Sugar
1 Tablespoon Paprika
1 Tablespoon Thyme
2 Tablespoons Black Pepper

Mix everything together (except the salmon), and rub it on the salmon. Let it rest in the fridge for a few hours, then rinse it off gently. After rinsing, sprinkle all the black pepper over the flesh and let it sit for another 20 minutes in the fridge. You're doing this because after it's been salted/sugared, the black pepper will help a pellicle (a tacky skin) form on the outside of the fish. After that's done, throw it into your smoker for about 30 minutes with good smoke, and from there, enjoy! It goes great with a very simple chevre "mousse", recipe below.

1 cup Chevre
1 Teaspoon Shallot (minced)
1 Teaspoon Chives (cut very small)
1 Teaspoon Black Pepper
1 Teaspoon Lemon Zest
1/8 cup Water

Throw everything into the food processor and blend it smooth. The water is purely for texture, so feel free to add as you see fit.

Til next time!

Tuesday, May 17, 2011

Household Tricks

Something I've noticed about the way we eat when we're at home, is that we prefer things that take less time. It might be because there is very little time to do the cooking, or because you don't like spending that much time cooking, or maybe because you just don't like to cook. Time is one of the things we have to work around in the restaurant industry, and as such, we are privy to a lot of great methods of making things quick to cook. Today, I'll be sharing a few of the easier and more home friendly tricks that we use to make it quicker when the time comes to cook.

Do Prep In Advance - This cuts the most time out of cooking. You can cook every night for a week and never spend more than 15 minutes cooking if you spend a few hours doing simple prep, once a week. And I'm talking really simple. Cook 4 pounds of pasta to al dente, cut 4 chicken breasts on the bias (1/4" thick), cut a flank steak the same way, chop a bunch of asparagus, mince a cup of garlic (food processor, pulse it!), mince a cup of shallots, and you've got the base ready for dinner every night. Admittedly, it will all have pasta in it, but the time you save is amazing.

Plan For It - This is VERY related to the trick above. In restaurants, everything goes quickly because regardless of what you're ordering, we're already prepared to make it. If you sit down for half an hour before going out to shop, you can make up a menu for the week ahead, and a shopping list. Make your one trip to the store, and be ready for the week knowing that you have everything.

Utilize Everything - Total utilization sounds a lot better than cooking with leftovers, doesn't it? While we don't actually use leftovers in the restaurant industry,  we do utilize everything. Trimmed a beef tenderloin for steak? Perfect, use the trimmings for soup. Not only do you get several sizable steaks from the big piece of meat, but with the addition of chicken stock, onion, celery, carrot, and some mushrooms, you've got soup as well. Don't throw it away!

Do "Prep" In Advance - Yes, this is different from the one above. While some things can only be done a week in advance (or a few days for fish/meat), other prep items can be done weeks, or even months in advance. Marinades for example. Going to marinate something at some point in the next 6 months? Might as well plan ahead. Mix up a half gallon of your marinade, and whenever you feel like it, ladle some out for that chicken breast, or that skirt steak, or even those shrimp. Stock can be done far in advance as well, and it is way way waaaaay cheaper to make it yourself than it is to buy it. (Alton Brown has a great recipe for chicken stock, it's on the 2nd post I think, as well as the food network website)

That's it for now! Bacon.

Saturday, May 14, 2011

Jam!

Due to a recent work schedule change, I can no longer post while at work, which may unfortunately mean fewer posts, just because I'm so tired after getting back, and usually I'm not up early enough to post before leaving. I'm going to try to not let it affect the blog, but you know how things go.

On to the food!

Today's post will be a fairly short one, as it is a mostly hands off project, and when it comes down to ingredients, they can almost be anything. We'll start with a simple example though, Onion Jam. This jam is a very sweet savory jam, which is great on just about anything really. It's also not exactly a jam consistency (much chunkier).

So, here's our list of ingredients.
2 White Onions
1 Cup Sugar
1 Cup Apple Cider Vinegar

Short, right? Well, step 1 is to cut down the white onions into small pieces (julienne, small dice, it doesn't really matter, go for whatever kind of pieces you like), and toss them into a pan over very low heat. Very low heat. Caramelizing onions can take a very long time, but fear not, your patience will be rewarded. Leave the onions sitting in the pan. If you poke at them more than once every 10 minutes, that's too often. You don't want them to move, just sit there in the pan, barely sizzling. If you can hear it from another room, the temp is too high.

Once your onions are caramelized (you're looking for a golden brown, maybe a little lighter or darker depending on how you like it), toss all of the sugar and vinegar into the pan with the onions, give it a stir so the sugar can dissolve, then let it reduce until there's only a few tablespoons of liquid left in the pan.

Pull it off the heat and let it cool down on a sheet pan, cookie sheet, anything flat and metal you have lying around that fits inside your fridge. Voila! Onion jam.

This method can be applied to almost any ingredient. Some jams I've been thinking about trying are ones like Raspberry Habanero, Pomegranate Basil Habanero, Lemon Cilantro Jalapeno, and dozens of other habanero/jalapeno concoctions. Can you tell I like spicy food? I'm also kicking around Bacon jam, but I'm not sure how to tackle that one just yet.

Questions? Requests? Leave em in the comments! (I'm getting around to eggs and kosher stuff, I swear!!!)

Thursday, May 12, 2011

Technique

One of the most difficult parts of being a good cook is mastering some of the most simple techniques. Many people rely too much on their eyes when it comes down to cooking, when really they should be using as many senses as possible. The food will tell you when it's done, not the other way around. Here are a few things you should be doing when cooking, so you can start applying all your senses in the kitchen.

Sight - We all use it, the trick is using it correctly. Look at the pan on the stove. Just because you see some kind of vapor rising from it, that doesn't make it smoke (a very common mistake). Look for a couple things in the pan when you're cooking. The "cooked" color will start to rise up the side of your product, which is a good indicator of time to check the other side. Just because one side is "cooked" that doesn't mean it's ready to flip though. You want to see browning, and you want to see bits of the same color sticking to the bottom of the pan (fond).

Sound - Listen for the sizzle! This can either be a good indicator or a bad one. If you're going to saute something in butter, you want to have a very prominent sizzle sound, but not TOO loud because that means your pan is too hot (your butter will brown in a heartbeat as well, which is a bad sign of pan temp). The easy rule of thumb for sizzle - the louder it is, the hotter the pan. If you're caramelizing something, you want to just barely be able to hear it.

Smell - Aside from certain spices and herbs releasing their most potent scents when they blossom in the pan, smell can tell you almost everything about anything you want to cook. Smell that cheese in the oven? It's about to start browning. Smell a slight nutty aroma coming from your roux? You just went from blonde to brown. Smell smoke? You forgot something in the oven. Smell something that burns your nostrils like the mighty wrath of Cthulhu? Too much vinegar in the pan. But above all - learn to recognize smells. I can't tell you what things will smell like, but aside from it helping you know when your piece of seared butter glazed halibut is done, it's also a fancy trick when you go out to eat (it's fun to be able to pick apart the ingredients of something by smell alone!). It's also a great thing to have a skilled nose when it comes to wine, but those descriptions can be waaay out there.

Touch - Poke your steak. Poke your chicken. Poke your fish. All flesh becomes firmer when it's cooked. The amount of resistance that it gives you will indicate how much of it is raw and how much is cooked. If you poke your finger into the middle of a steak and it squishes, it's still very rare. If it's nice and firm bounces back very quickly, you're probably nearing or already at well done. Depending on how you like your meat cooked (I like my steak bloody), you're probably looking for the steak to bounce back after you poke it, but not perfectly. This means that the outer parts of the steak are cooked through, while the middle will still be pink.

Taste - Stick your finger in the damn pan.

Tomorrow! We'll get down with some eggs and some jams (practice your caramelizing skills!). Requests? Questions? leave em in the comments.

Tuesday, May 10, 2011

Mousse

Today, we'll be making chocolate mousse, but first I'd like to give a shout out to a very good friend of mine who just released a hip-hop/rap album. I'm not much for the genre, but I gave it a listen and really liked it. You should check it out too. His name is DMLH, his album is Actually Happening, and there's a lot of samples on his website -- www.dmlhism.com -- I highly recommend going over and checking it out.

Now, on to the mousse. The vast majority of mousse recipes involve egg yolks, cream, sugar, water, and whatever you're using as the flavor, be it chocolate, white chocolate, pumpkin, berries, etc. These mousses are generally on the thick side (egg yolks), and have a very heavy texture (describing food can be confusing). These can be great, but for right now I'm going to teach you a different way to make mousse, one that doesn't use egg yolks. It's a much easier recipe too.


So, our base for the mousse is simple. Ingredients...
2 Egg Whites
Half a Lemon
1/4 cup Sugar
1 cup Heavy Whipping Cream

So, you'll start by throwing your egg whites into a mixing bowl, and whipping them on high speed with a stand mixer, slooooowly adding in lemon juice and sugar (you only want about 1/2 to 2/3 the lemon juice in the half lemon), and whipping until you get stiff peaks (You should be able to dip the whip attachment for the stand mixer into the egg whites and come up with a stiff peak on top - think dairy queen). Stick it in the fridge when done.

Repeat the process, minus the lemon and sugar, for the whipping cream. Toss it into the fridge as well.

For the last piece, you can do whatever you like. For white chocolate, melt down a bag of white chocolate in a double boiler (doesn't really "melt" so check it with a spatula for consistency, and if you dont have a double boiler put a bowl on top of a pot of water), then fold the egg whites into the chocolate, followed by the whipped cream. Tada!

For berry, place the berries into a pot with 1/8 cup of sugar, and put it over low heat. You want all of the liquid to come out of the berries so it creates a syrup with the sugar. I recommend simmering the berries for a few minutes, then hitting it with an immersion blender (or a food processor/blender since most people don't have an immersion blender), and running it through a strainer to get pulp/seeds out. Fold it together like above. (but make sure the berries are cooled at least a little, they'll get hotter than the chocolate and you don't want them destroying your bubble structure)

That's all for today! If you have any requests, feel free to leave them in the comments and we'll whip something up here in the kitchen!

Sunday, May 8, 2011

Things You Don't Do In A Kitchen, Part 2

So, after missing a post yesterday due to exhaustion, here we go with the exciting finale to our story about "Joel"

Well, as you all know from the last post, every day we would normally find Joel stroking his dick in the alley while everyone else was working. This irked us, yes, but he got back to work once we started in on it, so it never really seemed that bad. It was only the tip of the iceberg though, as we would eventually discover. Once our culinary school externs finished their externship, Joel was alone in our commissary kitchen doing prep work while Rob and I would run one restaurant, and Patrick the other. This was where it began to go down hill. Fast.

It started out with him just being slow, meaning we had to work right up until 5pm when dinner service would start at our fine dining operation. This wasn't a big deal, we weren't rushed, we were just barely fitting it all in at a normal pace. Until Joel started fucking things up. Then we found ourselves prepping until 5, then Rob would open the restaurant and the rest of us would finish prepping, sometimes almost until 5:30, because we would have to redo something that was inevitably screwed up by Joel. Sometimes the things are understandable. Not acceptable, but understandable. Other things...not so much.

A few things that Joel fucked up in his time with us
Scones (omitted an ingredient and insisted it wasn't in the written recipe)
Mayo (1 egg 1 cup oil shouldn't be that hard to remember)
Potato Salad (see above)
Scones (ignored the recipe)
Scones (Don't remember how exactly, but it was strike 3 on scones)
Dishwasher ($400 repair)
Risotto (over cooked)
Salad Dressings (dude can't emulsify)

It wasn't just things he fucked up either. It was the cigarette breaks every 15-20 minutes, stopping what he was doing every time he said something (and he couldn't keep his mouth shut), and just slowing things down across the board.

On a number of occasions, he air-humped me. Once, he actually grabbed my hips. For the record, none of those occasions could be taken out of context, because he just did it out of nowhere. Normally I would pay it no mind. But he was a big bald ugly mother fucker. It was just plain wrong.

Happy Mother's Day!

Friday, May 6, 2011

Things You Don't Do In A Kitchen, Part 1

Over the past 2 months, the team here in the kitchen hired and fired someone. Let's call him...Joel. He had done his culinary school externship with us in late summer last year, and despite initially having a profound "I don't give a fuck" attitude, he turned around half way through the externship, pulled his head out of his ass and did some great work. He was almost hired on, but I happened to be doing MY externship at almost the same time, and I was better than he was.

Naturally, when the time came that we needed to hire someone on, we went to him because he knew us, and he knew our system, and he understands our somewhat unique kitchen language. We were all excited to have him come back, because after a couple months, we did miss the guy a bit. 

We've come to the realization that we don't know why we missed him. 

During those months between externship and job, he somehow managed to wriggle that fat head of his further into the depths of his cavernous rectum, like a baby crawling back into the womb. It was terrible. Kitchens, like other businesses and offices, has a hierarchy. It starts at the Owner, then the Executive Chef (in our case, its the same person), then the Sous Chef, then line cooks, then pantry cook, then prep cook, then dishwasher, with culinary school externs bringing up the very rear. In our kitchen, the hierarchy is very small. It starts with Patrick (executive chef/owner), followed by Rob (sous chef), followed by me (pantry cook), and then bringing up the rear was our sphincter spelunking friend, Joel (prep/dishwasher). 

In the wake of Joel's first month back with us though, we had to edit the chain of command significantly to put his ego in check, so it went from Patrick, Rob, Kyle, Joel; to Patrick, Rob, Kyle, Top Oven, Fryer, Bottom Oven, Timmy (used to work for us, but his work was absolutely horrific), Joel. That's right, we put him after 3 inanimate objects and a former employee. He was that bad.

At first, we were all excited to have him back. However, we had brought him back in because we were expanding, and since we had 2 externs already working with us, we needed him to supervise them and lead the way on prep work, since the rest of us were busy with things that he wasn't qualified to do. Then the problems started. 

***Pro Tip: When you start a job, make sure you understand what it is you're supposed to do***

Joel came in. The externs had been with us for 2 months. We just started a new menu (we rotate it monthly). Joel didn't know anything about it. With this knowledge, and the knowledge that your job is to prep/supervise the externs, your job shouldn't be that difficult. Every day, we would arrive at the commissary kitchen where Joel and the externs were, and we would be greeted with busy externs, and Joel sitting outside with a cigarette in his hand, stroking his engorged belly, telling us there was no prep to do. We would inevitably go into the kitchen and pick up our knives, because there was always prep to do. Rob tells me this is the most accurate description of Joel's behavior that he has heard.

And it only got worse from there. I'd like to keep this post at a readable length though, so we'll finish the tale of the lazy tard tomorrow.

Thursday, May 5, 2011

How To: Scones and Gravy

Good Morning! It's that time once again, here in Beervana. That's right. It's breakfast time! I got my coffee before getting on the laptop, so lets get right to it. Today, we're making Bacon Cheddar scones, and (as requested) a gravy to go with those biscuits from yesterday. I'm hungry, so let's dive right in.

First up on the prep list today is scones. They're really simple to make, and the recipe is so adaptable that with only minor adjustments you can make any kind of scone imaginable. With this particular recipe, we here in the kitchen have made White Chocolate Pistachio Sour Cherry, White Chocolate Walnut, Dark Chocolate Coconut, Maple Walnut, Maple Bacon, Bacon Cheddar, Olive Parmesan, Dark Chocolate Sour Cherry, Jalapeno Onion Cheddar, the list is damn near endless. It starts with...

8 oz AP Flour
1 oz Sugar (If you want to do a sweet scone, add 1 oz sugar)
2 oz Butter
1 tbsp Baking Powder
1/2 cup Half and Half
1 Egg

(Again, all oz measurements are by weight)

That's the scone dough, all on it's own, but what fun is that. So, let's add 4 slices of bacon and about a half cup of cheddar cheese, it can be shredded, grated, chopped, however you like it. (Smaller pieces will give you a better end product)

Step 1 - Chop up your bacon into real small pieces and throw it into a pan over medium-low heat and leave it there for a while (give it a shake every now and then), because you want to render out as much of the fat as possible. Save that fat though, every kitchen should have a bacon fat cup (we have an entire crockpot). 
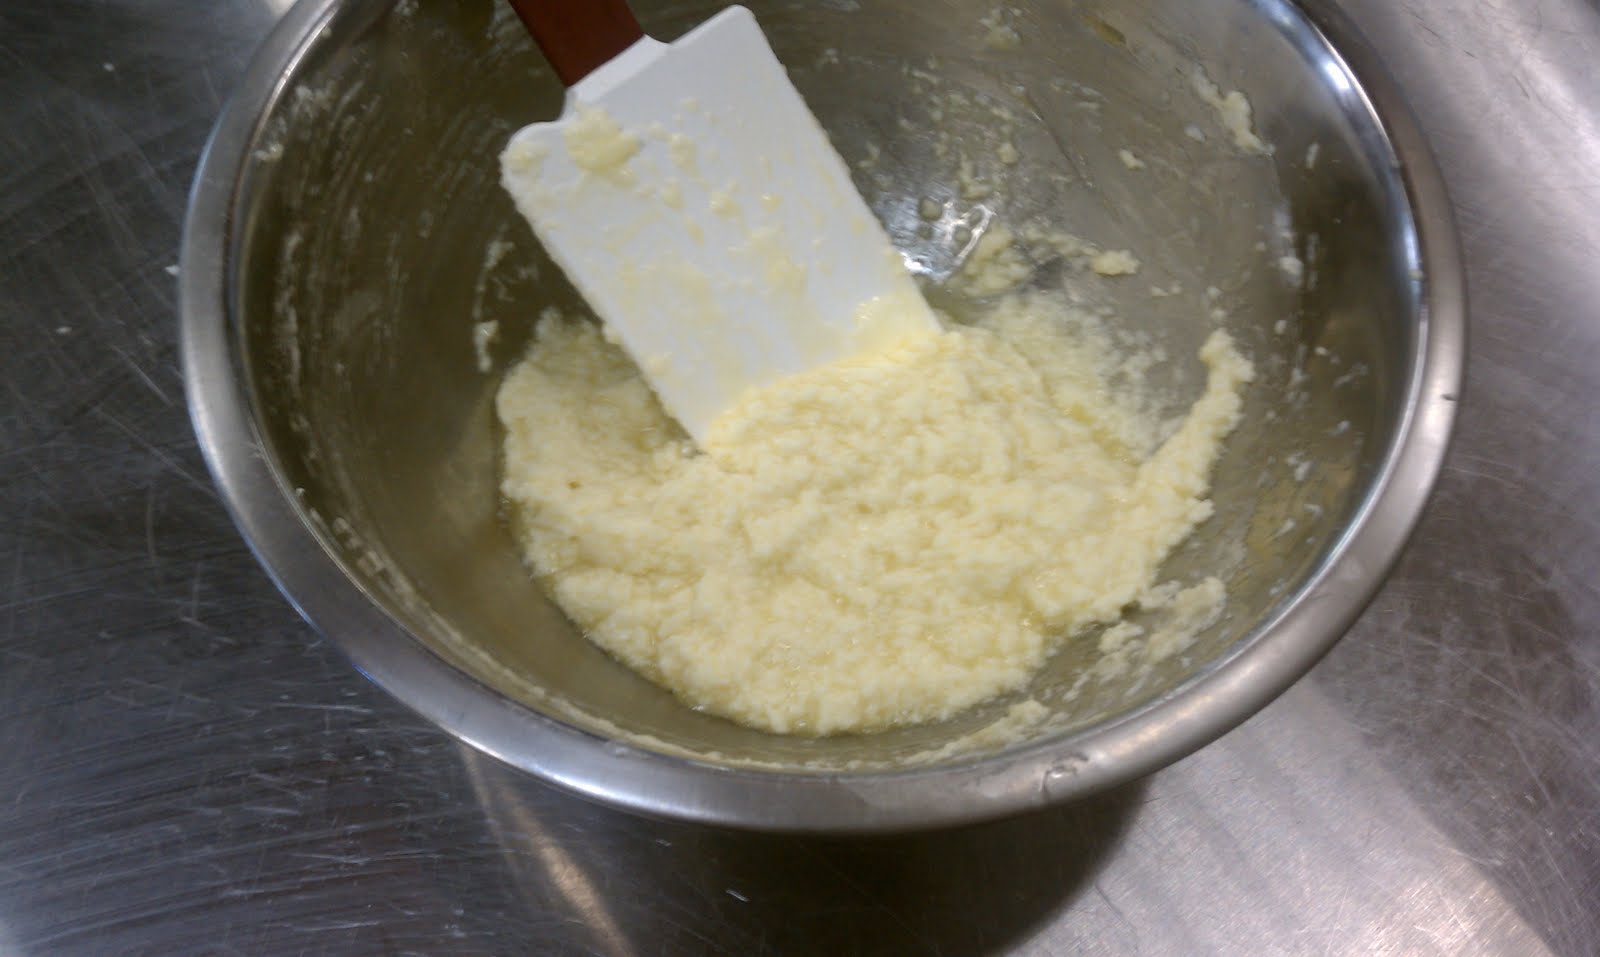
Step 2 - While the bacon is rendering, mix your sugar and butter into a smooth paste (process is known as creaming), and then add in your egg, mixing with a whisking until it's incorporated, followed by the flour and baking powder, with half and half coming in right after, and the bacon and cheddar bringing up the rear. You'll want to abandon tools and get your hands in the bowl after the flour goes in.
Step 3 - Rest the dough for ~10 minutes.

Step 4 - Turn the dough out onto a lightly floured surface, shape it, cut it, and bake it. 375 degrees, 12-14 minutes (in a convection oven, longer in a non convection). If you don't like timers, just watch til they get golden brown.
Now for some gravy to go with those biscuits from yesterday. Normally (and by normally I mean like 95% of the time) the gravy you get with biscuits and gravy is a pork sausage gravy. Unfortunately, we didn't have sausage in the kitchen. That didn't stop us though, any excuse for more bacon is a good excuse. 

16 oz Milk (volume = weight, so 2 cups)
4 oz Flour (roughly 1 cup)
4 oz Bacon Fat (but butter will work)
3 slices Bacon


Step 1 - Chop up the bacon as you see fit (I prefer small small pieces but that's just me), and toss it into a pot to start rendering over med-low heat. 


Step 2 - Once the bacon is rendered to your liking (the crispier the bacon the better, texture wise), add in your flour and bacon fat, whisking it together into a roux. You don't want to brown the flour at all, so don't hesitate about throwing everything in the pan. 

Step 3 - Pour your milk into the pot, give it a good mixing so it all comes together, and let it simmer for 10-15 minutes. You're looking for the taste of the flour to disappear, and for the gravy to thicken. I like a good bit of black pepper in my gravy, but spice/salt/pepper is all up to you. 


That'll be it from the kitchen today, if you've got a question or a request, drop it into the comments! Have a request but it's too vague? Give us an ingredient, we'll try to keep it interesting :P

Wednesday, May 4, 2011

How To: Biscuits

Good Morning!  Here in Oregon it's just after 7am, and that means breakfast time. So, after I've had my coffee, we'll get down on making some biscuits.

(3 cups of coffee later...)

Let's get started with some biscuits, shall we? All measurements are by weight.

20 oz AP Flour
1 oz Sugar (not pictured because Rob's a dick and mixed it into the flour already)
3/8 oz Salt (.375 oz)
1 1/4 oz Baking Powder
7 oz Butter (cold)
13 oz Milk

Step 1 - mix the flour, salt, sugar, and baking powder together.

Step 2 - Cut the butter into the flour, using metal spatulas, bench scrapers, anything of the sort really. Rubber/silicone/plastic spatulas work as well, but tend to be less effective in cutting due to their dull edges.

You're done once the butter has been cut down into pea sized pieces.

Step 3 - Make a well in the middle of your flour/butter, and pour in some milk. Gently work the flour into the milk by pushing it in from the top of the well. Once that is worked together, make another well and incorporate the rest of the milk.

Step 4 - Flour your work area and lay down your dough, then fold it onto itself several times, then roll it out to about a 1/2 inch thickness.


Step 5 - Cut and bake (10-12 minutes in a 375 degree convection oven), pull them out once they're golden brown.


Tomorrow, We'll get going on some other breakfast pastry items. I'm thinking bacon cheddar scones with an egg in the middle.

Tuesday, May 3, 2011

Artificial Food

Rant time. Yesterday evening, around 8pm, I was doing some prep work for a menu change, and I picked up a box of chicken stock. Normally, I would just drain the box into the soup and continue on with other prep, but seeing as this was the last item on my list, I paused and looked at the box. One of the ingredients in the stock was "Natural Chicken Flavor". When there are processed ingredients that contain multiple ingredients, the box is required to show those ingredients as well. So I peer into the parenthesis, and the first ingredient of "Natural Chicken Flavor" is "Natural Chicken Flavor" (followed by water/salt).

Does this bother anyone else? That here in the good old USA we don't need to actually tell you what you're consuming, as long as it's legally ok to put it on the box? Now I know what natural chicken flavor is, so this particular instance doesn't irk me too much (just a little), but there are other similar things that bother me too. For example, I have next to me a bottle of apple juice, which the bottle claims is "100% Juice". Let's check the ingredients shall we? Water, Apple Juice concentrate. Lovely! My 100% apple juice is processed apple concentrate, with water added back so it fits a ratio that the government says is ok to call 100% juice.

And then there's "Cheese food" - I'm not sure I even want to know.

By the way, natural chicken flavor is chicken scraps that are unusable for meat products, which are cooked, dehydrated, and powdered. So next time you see natural chicken flavor, remember that it's actually chicken powder. Before I end up going down a taco bell beef rant...

Here's a chicken stock recipe from my favorite TV chef, Alton Brown. It's also one of the best stock recipes around.

  • 4 pounds chicken carcasses, including necks and backs (chicken bones for those of you who aren't breaking down whole chickens)
  • 1 large onion, quartered
  • 4 carrots, peeled and cut in 1/2
  • 4 ribs celery, cut in 1/2
  • leek, white part only, cut in 1/2 lengthwise
  • 10 sprigs fresh thyme
  • 10 sprigs fresh parsley with stems
  • 2 bay leaves
  • 8 to 10 peppercorns
  • 2 whole cloves garlic, peeled
  • 2 gallons cold water
So, it's a really simple recipe. Chuck it all into a big pot, bring it to a boil, reduce to a simmer, and let it go for at least 6 hours, skimming the scum from the surface periodically. Alton recommends putting a strainer basket down in the bottom of the pot on top of everything to keep all the big stuff from surfacing. It's a good recommendation. Stock can be frozen, and has a long shelf life. 


Starting tomorrow, I'll begin how-to posts, so anyone who reads can start making everything from scratch.

Monday, May 2, 2011

Monday Mornings...

Are rough. Sunday is my only day off each week, and occasionally I still work a few hours when necessary. Yesterday was one of those days. It isn't really that bad, doing a bit of work on the days off, but it contributes to the feeling of working non stop. My work schedule looks a little something like this...

Monday: 5:45am - 2:30pm
Tuesday: 5:45am - 10:00pm
Wednesday: 5:45am - 10:00pm
Thursday: 5:45am - 10:00pm
Friday: 5:45am - 10:00pm
Saturday: 10:00am - 10:00pm

So you can see how working for a few hours on Sunday afternoon would feel. However, this time it was because we are doing our monthly menu change in the fine dining restaurant, so seeing the menu early is never a bad thing. I'm excited to see how everything is executed, because there are duck confit tacos  on the menu, but I know the chef. There's no way in hell it's gonna be that simple.

Today's random recipe idea - Caprese Salad stuffed cherry tomatoes. Cherry tomatoes, use a melon baller to scoop out the guts, then put a small piece of mozzarella inside, followed by basil, and topped with another piece of mozzarella. Drizzle with olive oil and balsamic, sprinkle with sea salt and black pepper.

Also, Osama Bin Laden is apparently dead. (Obligatory)

Sunday, May 1, 2011

I'm Ashamed To Say...

That I've actually done the following things.

Deep fried cookie dough wrapped peeps.
Burgers with fried chicken skins.
Sea salt and bacon caramels.
Maple glazed bacon and sausage roulade. (only ashamed because of the outright unhealthiness, was an awesome breakfast with the parents though)

Now don't get me wrong. I love experimenting with food (french toast ice cream), and I do tend to stray to the unhealthy side a bit (bacon...), but sometimes there are things best left uncooked. Everything was delicious, there's no avoiding that, but for someone with classical french training who works primarily in fine dining, you'd think I would be setting my sights a little higher.

Looking back, I'd say there have definitely been some classier moments. For example, back in culinary school I did french beignets (ben-yays) while working in the restaurant. Everyone raved about them, and I won't lie - that felt really good. So hopefully I can find the recipe I used before I finish this post.

Now I'm gonna have to stop you right here. If you think you know what kind of beignets I'm talking about, you're probably thinking about the doughnuts you see in Nawlins at Cafe Du Monde. Well you're wrong. The original beignet (and I'm talkin way back) is essentially a French churro. Made with a very similar batter/dough (the consistency makes it hard to tell) and the addition of Kirsch (classically), the beignets were not rolled and cut, they were piped straight into the fryer. I strayed a little bit. I did two different batters, one with Kirsch, the other with Triple-Sec, and they were dusted with powdered sugar and served with a honey lemon triple-sec reduction.

Good times...

Sadly I could not find the recipe. I believe it is in one of the culinary school books left behind at my parent's house from back in the day. I will find it though, and I will post it, because you all need to try it. It's pretty good if you use cocoa powder in it and make chocolate beignets too.

Saturday, April 30, 2011

Rough days

Shorty today. Waking up at 9:30am to be at work by 10:00am, to work until 10:30pm when I can finally post. Sadly, nothing of excitement happened today except a very busy dinner service. I am excited about other things though. Fairly soon, the crew here at the restaurant (luckily that includes me), will be flying out to New York to film Iron Chef. My boss, the executive chef/owner of one of the restaurants I work at, was selected to cook on the show.

Not sure about when exactly we will fly/film, or when the episode will air, but wish us luck! I'll be sure to post again when we leave.

Today's random recipe idea - deep fried, BLT stuffed avocados. I think it'll work.

Friday, April 29, 2011

Let the bacon commence

So, after a long chat with the other guys here in the kitchen, we've come up with some potential pastries. Most of them have bacon in them. The rest have bacon as well.

Bacon fat profiteroles with chocolate walnut pastry cream, dipped in a maple glaze.
Profiteroles with bacon maple pastry cream, chocolate glaze.
Maple bacon walnut eclairs, chocolate glaze and entire strip of bacon inside each eclair.
BLTA eclairs, layered bacon, tomato, lettuce, and avocado mousses (except the lettuce, lettuce mousse is nasty) inside an eclair, bacon glaze.

Debating which to play with first. In the mean time, here's my favorite recipe for maple bacon cinnamon rolls. (Original recipe - Alton Brown)

  • 4 large egg yolks, room temperature
  • 1 large whole egg, room temperature
  • 2 ounces sugar, approximately 1/4 cup
  • 3 ounces unsalted butter, melted, approximately 6 tablespoons
  • 6 ounces buttermilk, room temperature
  • 20 ounces all-purpose flour, approximately 4 cups, plus additional for dusting
  • 1 package instant dry yeast, approximately 2 1/4 teaspoons
  • 1 1/4 teaspoons kosher salt
For maple bacon rolls, I like to switch out the sugar for maple syrup, and a portion of the butter with rendered bacon fat. For those of you that don't know the method, mix everything but yeast flour and salt. Once it's all mixed, add in salt, yeast, and about half the flour. Once that is all incorporated, swap over to a dough hook and work in all but 3-4 ounces of flour. That flour is there only if your dough needs more. It should be moist but not sticky. Once that consistency is obtained, knead it by hand for 5-6 minutes, then transfer it to an oiled bowl. Oil the top of the dough lightly (or use more rendered bacon fat), let it double in size, covered. About 2 hours.

Filling time! This is the fun part. A normal cinnamon roll filling would be about 90% brown sugar, 9% butter, and 1% cinnamon. Fuck that. We want some maple bacon goodness. Our filling will be about 30% brown sugar, 50% extra crispy bacon chopped up real fine, 5% cinnamon, and 15% maple syrup. Normally there would be salt here too, but the bacon does that for us. I recommend making the bacon as crispy as possible, so you get a good texture in the finished product.

Once your dough has risen, pound it down and roll it into a large rectangle. Cover this rectangle with your filling (minus a half inch or so running the long way, so you can seal your rolls) and roll it up. Cut, pan, cover, and leave them over night to rise again. In the morning, take em out, and bake em! 350, you know what they look like when they're done.

I don't ice these babies, I go for more maple syrup and bacon chunks.

Thursday, April 28, 2011

Day 1!

First post. Nothing too exciting. Might as well eat...

The smell of bacon, coffee, biscuits and gravy. Breakfast is the best time of the day. Crispy bacon, pork sausage gravy on my handmade bacon biscuits (substituted bacon fat for some of the butter, it's almost good enough to make me believe in a god), and coffee with cream and raw sugar. It's a good time to not be vegan. Sorry, but there is no substitute for bacon. Don't care what you say or who you are.

Thinking about baking a lot lately...maple bacon walnut cinnamon rolls sound like fun to do. Maybe something more mind blowing, maple and bacon is no surprise to anyone anymore. Maybe eclairs filled with a bacon walnut mousse. Maybe profiteroles. We'll see how it goes I guess, if all is well I'll leave a recipe behind.